Quick Menu
The Quick Menu is a context-sensitive menu that appears when you right-click objects in Brain Visualizer. It provides instant access to the most relevant operations for the selected object, dramatically speeding up your workflow.
What is the Quick Menu?
The Quick Menu is a dynamic toolbar that shows different options based on:
- What you clicked: Cortical area, brain circuit, or empty space
- Where you clicked: Circuit Builder vs Brain Monitor
- How many selected: Single object vs multiple objects
- Object type: Different options for different cortical area types
This context-awareness means you always see relevant operations without navigating through menus.
Opening the Quick Menu
Standard Method:
- Right-click on any cortical area or brain circuit
- Menu appears centered near your cursor
- Click an operation to perform it
Context:
- Works in Circuit Builder (2D view)
- Works in Brain Monitor (3D view)
- Menu appearance and position optimized for context
Quick Menu for Cortical Areas
When right-clicking a single cortical area:
Details Button

Function: View and edit cortical area properties
Opens the Cortical Area Details window with complete access to all parameters:
- Basic properties (name, dimensions, position)
- Neuron firing parameters
- Memory parameters
- Post-synaptic potential settings
- Neuron coding (IPU/OPU only)
- Monitoring and visualization
- Connection management
- Delete and reset operations
See the Cortical Area Details guide for complete documentation.
Opens: Advanced Cortical Properties window showing:
- General properties (name, dimensions, position)
- Statistics (neuron count, activity)
- Connections (afferent and efferent)
- Advanced settings (learning, plasticity)
Use When:
- Need to check area configuration
- Want to modify parameters
- Viewing connection list
- Troubleshooting issues
See Cortical Areas for more details.
Quick Connect Button

Function: Create connection to another cortical area
Workflow:
- Click Quick Connect
- Window opens with source already selected
- Click a destination in the current brain monitor, or click Edit to open Cortical Area Explorer and select one or more destinations from any circuit
- Choose connectivity rule
- Optionally enable Advanced to set PSP multiplier, inhibitory, synaptic delay, and plasticity. Episodic Memory and classifier destinations do not show Advanced.
- Establish the connection
Use When:
- Building neural circuits
- Adding new pathways
- Connecting inputs to processing to outputs
See Mapping Connections for details.
Neuron-Level Quick Connect Buttons
Connect Cortical Area → Neurons:
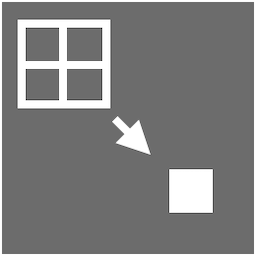
- Connect this area's outputs to specific neurons in another area
- Fine-grained control
- Advanced use case
Connect Neurons → Cortical Area:
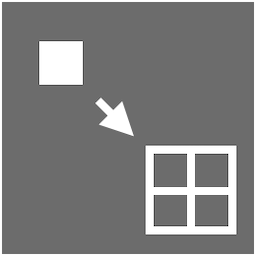
- Connect specific neurons to this area's inputs
- Precise wiring
- Advanced use case
Connect Neurons → Neurons:
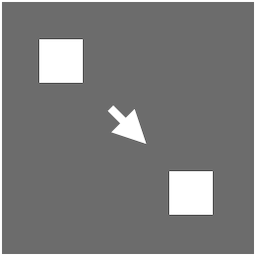
- Direct neuron-to-neuron connections
- Maximum precision
- Expert-level feature
Clone Button

Function: Duplicate this cortical area
Process:
- Click Clone
- Window opens with area properties pre-filled
- Modify name (required - must be unique)
- Adjust position, dimensions if desired
- Click Clone
Result:
- New cortical area created with same configuration
- No connections copied (starts unconnected)
- Same type, parameters, and connectivity rule defaults
Use When:
- Creating similar areas
- Building symmetric structures
- Rapidly prototyping
Add to Region Button

Function: Move cortical area to different brain circuit
Workflow:
- Click Add to Region
- Window shows region hierarchy
- Select destination region
- Click Move
Result:
- Area moves to new parent circuit
- All connections maintained
- Position may adjust
Use When:
- Reorganizing genome structure
- Grouping related areas
- Cleaning up organization
See Brain Circuits for more details.
Relocate 2D Button

Function: Set exact 2D position in Circuit Builder
When Available:
- Only when right-clicking in Circuit Builder
- Not available from Brain Monitor
Workflow:
- Click Relocate 2D
- Enter X and Y coordinates
- Click Apply
Use When:
- Precise positioning needed
- Aligning multiple areas
- Organizing circuit layout
Move 3D Button

Function: Activate 3D movement gizmo
When Available:
- Available from both views
- Disabled in Circuit Builder context (use 2D relocate instead)
Usage:
- Click Move 3D
- Colored arrows appear in Brain Monitor
- Red = X axis
- Green = Y axis
- Blue = Z axis
- Click and drag arrows to move along that axis
- Click central sphere to move freely
Use When:
- Repositioning in 3D space
- Organizing spatial layout
- Creating specific arrangements
Resize 3D Button
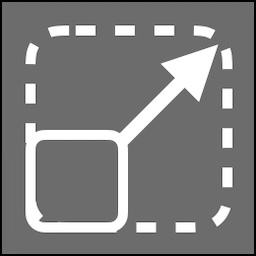
Function: Activate 3D resize gizmo
When Available:
- Only for Custom and Memory cortical areas
- Not available for IPU/OPU (dimensions determined by templates)
- Disabled in Circuit Builder context
Usage:
- Click Resize 3D
- Handles appear on cortical volume in Brain Monitor
- Drag handles to resize along specific dimensions
- Corner handles resize multiple dimensions
Use When:
- Adjusting processing capacity
- Fitting into spatial constraints
- Optimizing neuron count
Note: Resizing changes neuron count. Check capacity limits.
Reset Button

Function: Clear all neural state in this cortical area
What It Does:
- Resets all neuron values to initial state
- Clears learned synaptic weights (if plastic)
- Resets activity patterns
- Does NOT delete the area or connections
Confirmation:
- Requires confirmation before proceeding
- Cannot be undone
Use When:
- Starting fresh after testing
- Clearing corrupted state
- Beginning new training
- Debugging unexpected behavior
Delete Button

Function: Remove this cortical area permanently
What It Shows:
- Confirmation window
- Lists all affected connections
- Shows impact on other areas
Result:
- Cortical area removed from genome
- Mappings to and from it are removed with it
- Ctrl+Z (Cmd+Z on macOS) puts the area and those mappings back. The restored area gets a new id
- Learned synapse weights are not restored
- Core areas, interconnect areas, classifiers, and circuits are not restored this way
Use When:
- Removing unused areas
- Simplifying circuits
- Major restructuring
Caution: Confirm before deleting. Undo is available for this genome session only.
Quick Menu for Brain Circuits
When right-clicking a brain circuit node:
Details Button
Function: View and edit region properties
Opens: Region Properties window showing:
- Name and description
- Parent region
- Contained cortical areas
- Contained sub-circuits
- Statistics (total neurons, synapses)
Use When:
- Viewing region contents
- Renaming region
- Understanding organization
- Navigating hierarchy
Open 3D Tab Button
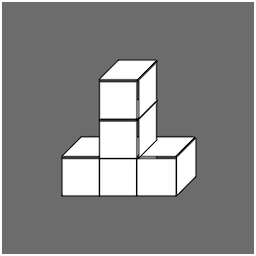
Function: Open this region in dedicated 3D view with split view
Result:
- Split View activates
- Circuit Builder shows this region (left/top)
- Brain Monitor shows this region in 3D (right/bottom)
- Both synchronized
Use When:
- Working on specific region
- Need both 2D and 3D views
- Monitoring region in isolation
- Focus on subsystem
See Split View for more details.
Clone Button
Function: Duplicate entire brain circuit
Options:
- Clone structure only (empty region with same hierarchy)
- Clone with contents (all cortical areas and sub-circuits)
- Clone with connections (internal and/or external)
Use When:
- Creating symmetric structures
- Replicating functional modules
- Building from templates
Caution: Can create many neurons. Check capacity first.
Add to Region Button
Function: Nest this region inside another region
Result:
- Region moves with all its contents
- Hierarchy reorganizes
- All connections maintained
Use When:
- Restructuring organization
- Creating deeper hierarchies
- Grouping related regions
Delete Button
Function: Remove brain circuit
Options:
- Delete region only (moves contents to parent)
- Delete region and contents (recursive deletion)
Confirmation:
- Shows what will be affected
- Lists contained areas and sub-circuits
- Cannot be undone
Use When:
- Simplifying hierarchy
- Removing empty regions
- Major restructuring
Caution: Deleting with contents removes everything inside.
Quick Menu for Multiple Selection
When multiple cortical areas are selected:
Available Operations:
- Details: View properties of all selected
- Arrange: Align or distribute the selection on X, Y, or Z. See Navigation Basics
- Add to Region: Move all to same region
- Delete: Remove all selected areas. One delete is one Ctrl+Z step
Arrange:
- Shown when at least 2 selected areas are in the same circuit
- Align X, Y, or Z snaps that axis to the lowest value in the selection
- Distribute X, Y, or Z needs at least 3 areas, keeps the outermost areas fixed, and spaces the others evenly
- Disabled when the selection includes a reserved core area or areas from more than one circuit
- The menu stays open after Arrange runs
Unavailable:
- Operations requiring a single target
- Type-specific operations
Use When:
- Bulk operations needed
- Lining areas up or spacing them in 3D
- Cleaning up circuits
Quick Menu in Empty Space
Right-clicking empty space in Circuit Builder:
Available Options:
- Create Cortical Area: Open creation wizard
- Create Region: Create new brain circuit
- Fit All: Zoom to show all objects
- Layout Options: Auto-arrange (if available)
Use When:
- Starting new structures
- Need overview
- Organizing layout
Quick Menu Keyboard Shortcuts
While Quick Menu is open:
- Escape: Close menu without action
- Click outside: Close menu
- Number keys: Select button (if numbered)
- Arrow keys: Navigate buttons (if supported)
Tips for Efficient Quick Menu Use
Muscle Memory
- Right-click becomes automatic: Practice frequently
- Learn button positions: Same layout every time
- Quick sequences: Right-click → button becomes one motion
- Keyboard combo: Right-click + key for speed
Common Patterns
Create and Connect:
- Create cortical area
- Right-click it → Quick Connect
- Choose destination → Create mapping
- Repeat for more connections
Inspect and Modify:
- Right-click area → Details
- Review properties
- Close details
- Right-click → appropriate modification button
Clone and Position:
- Right-click area → Clone
- Set name and parameters
- Right-click clone → Move 3D or Relocate 2D
- Position precisely
When to Use vs Menus
Use Quick Menu For:
- Operations on specific objects
- Context-dependent actions
- Frequently-used operations
- Workflow speed
Use Top Toolbar For:
- Creating new objects from scratch
- Global operations
- Settings and preferences
- Non-object-specific actions
Context-Specific Behavior
Circuit Builder vs Brain Monitor
Circuit Builder:
- Relocate 2D available
- Move 3D and Resize 3D disabled
- Optimized for 2D layout operations
Brain Monitor:
- Relocate 2D not available
- Move 3D and Resize 3D enabled
- Optimized for 3D spatial operations
Selection Context
The menu remembers where selection originated:
- Circuit Builder click → Circuit Builder context
- Brain Monitor click → Brain Monitor context
- Brain Monitor Shift + Left Drag box select → Brain Monitor context (all areas in the rectangle)
- Different options based on source
Troubleshooting
"Quick Menu won't open"
- Ensure you're right-clicking an object
- Check object isn't locked (if feature exists)
- Try clicking object first, then right-click
- Verify mouse right-click is working
"Some buttons are grayed out"
- Normal - context-dependent availability
- Disabled buttons aren't relevant for this object/context
- Hover for tooltip explaining why
"Quick Menu appears in wrong place"
- Should appear near cursor
- May adjust to stay on screen
- Can't be repositioned
"Pressed button but nothing happened"
- Check if confirmation dialog opened
- Look for error notification
- Verify FEAGI connection is active
- Check if operation requires additional input
Best Practices
- Right-Click First: Make it your first instinct
- Check Context: Notice which buttons are available
- Read Tooltips: Hover before clicking if unsure
- Practice Sequences: Build muscle memory for common operations
- Combine with Keyboard: Right-click + hotkey for speed
- Close When Done: Don't leave menu open
- Use Consistently: Faster than navigating menus
Related Topics
- Cortical Areas - Object operations
- Brain Circuits - Region operations
- Mapping Connections - Quick Connect feature
- Circuit Builder - 2D context
- Brain Monitor - 3D context
- Navigation Basics - Selection and interaction